
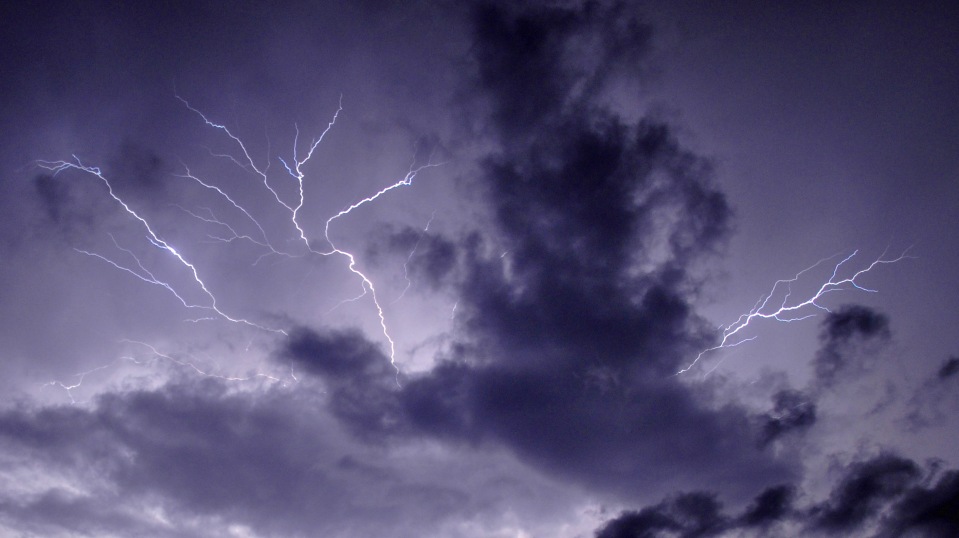
Lightning is one of my favorite photo subjects. For this particular photo, we go back seven years. I was driving home late in the evening and lightning was flashing around like fireworks. It started out as cloud-to-cloud lightning, which just flashed. Once I started seeing the forks, then I stopped. I happened to have my tripod with me and pulled off the road to get a series of quite decent pictures.
This presents a good photograph motto, coined from the Boy Scouts, ‘Be prepared’. I used to have a tripod stowed away in the car for just such an occasion. On this night, it paid off.
I’ve been asked before how I take such pictures, so I’ll give a quick description here.
- To take a good lightning pic you need to have a tripod. As a last resort you could use a stable structure, fencepost, wall, something that won’t move, and set the camera on top of that. Whatever you use, the camera should be absolutely still.
- Darkness is your friend in these cases as the darker it is the longer you can set your shutter speed. The longer your shutter speed the more chance you have of capturing a lightning bolt.
- Make sure you set your camera to manual focus and focus on infinity. Some cameras have a focus ring that can go beyond infinity, you’ll have to try to get the sharpest focus you can through trial and error.
- Set your ISO low, 100-400 should be good. You don’t want it too bright or the bolt will wash out.
- Set your shutter speed anywhere from 10 seconds to 30 seconds. If the storm is throwing out a lot of bolts very quickly you may want to stay on the 10 side so that you get more individual shots with lightning in them.
- If it starts to rain, try to take as much cover as you can while still maintaining your shot. An open garage is perfect. It gives you some protection from the rain but still allows for some movement to aim your shot.
- Aiming your shot is pure guesswork. Sorry, I wish I had a more scientific method, but I just aim where the last bolt hit and start shooting.
- Carry a plastic bag in your camera bag at all times. A gallon sized freezer bag is perfect. They’re thicker, providing more protection. If the rain is getting your camera wet, dry it off with a small towel (another important item to have in your camera case) and put the bag over it, then rip a small hole in the bag, just big enough for the end of the lens to fit through. Put the bag over the camera, poke the lens out through the bag and there you go, instant waterproofing. There are pre-made camera covers, but I’ve found this method to be perfectly acceptable up to a point.
- And we come to the last bit of advice. Get the hell out of there. If the last bolt hit so close that you don’t have to count between lightning and thunder, it’s time to leave. These are only pictures and not worth risking your life for. If you’re being pelted with rain so hard that you have to dry the lens off every few seconds, it’s time to go. Safety first. There will always be another storm. Strangely enough, I’ve found that my best pictures are taken right before the rain arrives and after it passes.
That’s my basic guide. I’m sure I’ve missed something. I’m also sure that other photographers could give more in-depth descriptions. This is just a beginners guide. Just don’t forget to experiment with all of these settings. Make it your own. Use what works for you.
And most of all, have fun.
Any comments are welcome. Do you have some advice to pass along that I missed, feel free to post it in the comments section, have a great story about one of your photo experiences, I’d love to hear it.
If you liked my picture, please feel free to visit my Photo website.

Pingback: Tuesday Photo Challenge – Three | mikesimages
Very nice image! And very useful tips.
Thank you very much. I hope they were helpful.